We have all seen organic matter decaying. The most common way of disposing organic matter is to bury it in the soil[1]. We will use the term “composting” to mean a planned and controlled process in contrast to just “decomposition” of organic matter which happens by itself. When you dump organic matter or just let it rot – that is just decomposition. Composting is a well-planned activity so that we meet certain objectives in terms of time and quality (of the end product and the by-products such as the gases released).
There are two principal methods of composting: Aerobic and Anaerobic.
Aerobic composting is a process which ensures a supply of fresh air (to be more precise – oxygen) to the bacteria which work on the decomposition of the organic matter. The bacteria release carbon dioxide which is odourless. Hence aerobic decomposition is “clean” – there is little or no odour. To the extent that we can maintain the process 100% aerobic by periodic mixing (exposing all contents to air) there will be no odour. However small pockets can exist which do not receive air. This can be due to improper mixing or formation of lumps within which there is no air circulation.
In addition to fresh air, for aerobic composting there needs to be the right proportion of carbon and nitrogen so that bacteria can live, thrive and also create rich compost – the end product of composting. The wet kitchen waste (or green garden waste) is rich in Nitrogen, whereas dry-brown leaves are rich in Carbon.
Anaerobic decomposition happens when decaying organic matter is not given access to fresh air (which contains about 20% Oxygen) such as when it is buried in the soil. It is a slow process and produces many smelly gases. The same happens when domestic kitchen waste is dumped in a heap or packed in plastic bags or closed containers. All of us know the foul smell when our kitchen waste is left in a bin for a day or more. The situation is much worse when large quantities of wet waste are dumped in a heap. Imagine what happens in a large scale dumping ground where not just thousands but millions of tons of waste has accumulated. The bigger concern is that during anaerobic decomposition gases like Methane are released which have no odour but are inflammable and also harmful to the ozone layer. Apart from Methane, smelly gases like Hydrogen Sulphide and Ammonia are also released.
For the reasons given above, Prudent Eco Systems has built composters which help aerobic composting.
Aerobic decomposition will rarely happen by itself and needs to be planned and controlled and hence we talk of it as a composting technique.
Aerobic composting is an age old technique used on farms to convert green and brown agricultural waste into useful compost.
The resultant organic compost is very rich in nutrients and helps in sustainable agriculture. It helps retain soil moisture and also bacteria which can further enrich soil on a continued basis.
STEP-1 – Measuring & Chopping wet waste
The first step in aerobic composting is to take a measured volume of wet waste which is appropriate to the size and number of composters available. (Sometimes people install composting systems in a phased manner so that only part of the waste being generated is composted. This measuring of waste is especially important in such “Capacity Limited” systems.)
The waste is first chopped into smaller pieces using garden shears. The smaller – the better. But it should not be made into a pulp. In case a powered shredder is being used, choose a shredder (like the 8B2H shredder from Prudent Eco Systems) which breaks the waste into about 1 to 2 cm size pieces and does not mash it into a pulp. This is because there should be circulation of air.
STEP-2 – Adding Carbon Rich Additive
To one volume measure of wet waste, it is appropriate to add half (or slightly less) volume measure of dry (brown) leaves in powdered form. This will give the right Carbon to Nitrogen ratio to the compost. It helps to introduce the carbon-rich material (leaves) in powdered form so as to blend well with the wet waste. Leaf Dust (Dry brown leaves converted into powder) is the best choice since it will coat all surfaces of the wet waste and will also save the labour of chopping dry leaves. In situations where dry leaves are not available, one can use cocopeat (a powder obtained from various parts of the coconut tree) .
STEP-3 – Blending the dry and wet waste
After having measured the dry leaf dust, it is important to blend it well. A rake or a trowel makes it easy. Ideally the carbon additive should form a powder like coating on the wet waste and this happens most easily when using leaf dust or cocopeat.
STEP-4 – Daily Aeration by mixing
The pile of blended waste needs to be aerated once a day. This is done by exposing different portions of the waste to air by thoroughly turning it up and down. For convenience this is done one quarter at a time. The blended waste from one quarter is removed until the bottom of the composter comes out clean with no waste sticking below. This is then piled up on the other three quarters. After about a minute or two of exposing this to air the waste is dropped back into that quarter and the next quarter is worked upon and so on until all four quarters are completed. One can use a long rake and/or a small trowel for this purpose. If small portions of waste are picked up with each movement of the rake, then this operation is easier to perform.
During the composting period, the operator would notice that the core of the composter has turned hot. The temperatures would easily cross 50 Deg C and sometimes can go as high as 70 Deg C on account of the exothermic reactions in aerobic composting and supported by some amount of solar insolation (in Prudent Eco Systems’ Composters). This stage (called thermophilic) can last from 2 to 5 days and is the phase in which rapid decomposition takes place. Even if the temperatures are not measured, it is common to see the vapours emanating from the core as mixing is done. During this phase, it is especially important to gauge the moisture content in the composter.
At the end of this phase, as the compost cools down, the actinomycetes (a white fungus like coating on the waste) is observed. These help in the breakdown of tough plant tissues.
STEP-5 – Maintaining Moisture
The compost pile inside the composter needs to have the right amount of moisture. It should not turn dry nor should it be allowed to become too wet and soggy. If it is dry, the composting process would cease to happen. If it is soggy, then anaerobic conditions would set in and there can be foul smell. If the pile is too wet, then more of leaf dust / coco peat needs to be added to absorb the excess water. This situation can happen in the wet season or when the food waste contains more water (such as juicy pulp from fruit and vegetable waste is significant in quantity). When composting larger quantities, the internal temperature can build up rapidly and moisture will be lost due to rapid evaporation. Water must be sprinkled and mixed so that composting can continue.
STEP-6 Processing of compost
Curing
At the end of the Composting period, the compost would be ready for curing the temperature would be close to ambient. It should have turned almost black in colour. This will happen when all conditions are met. Curing (or maturation) allows the last (“tail-end”) part of the composting reaction to happen slowly and completely. It does not need to be mixed but the compost needs to be kept damp and is best done in a jute or cotton cloth bag which is porous allowing some “breathing space”. The compost should be left in this state for about 20 days. After the curing period, the compost is ready for use in the garden even though it might not be completely in powdered form.
Any large pieces which appear to have not composted completely will not crumble easily and can be put back into the composter to merge with the next batch.
Storage & Use
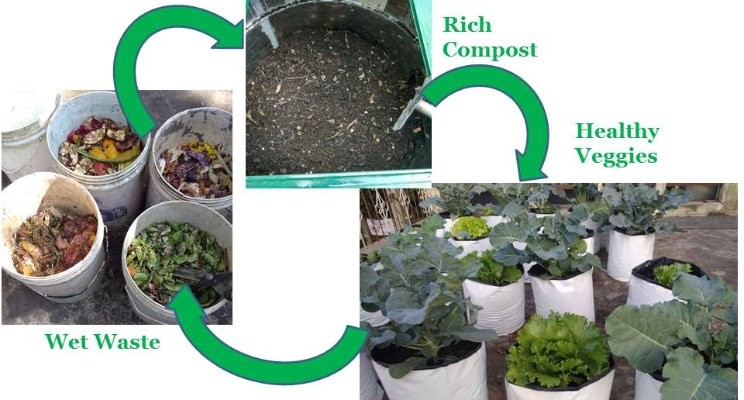
The cured compost can be added to the soil directly after . It can also be used as a potting mix or growing medium. This is especially useful when growing plants in containers like pots or boxes. While storing compost it is important to keep it slightly moist so that bacteria can survive and enrich the soil.
Reuse of Compost as Starter
A small amount of compost can be turned back into the next batch of composting as it will already contain the necessary bacteria and the process can be hastened.
This process of composting is simple to learn and easily repeatable as Prudent Eco Systems has demonstrated in various homes and apartment complexes in Bangalore. As more communities take up on-site composting, we will see significant reductions in amounts of waste being dumped in landfills. What can be done at source should not be transported across the city even if for processing.
The picture below shows a community composting system installed by Prudent Eco Systems capable of handling more than 5 tonnes per month.
[1] We will not discuss burning of waste (incineration) https://en.wikipedia.org/wiki/Incineration


